Lace Knitting Basics
Learn the basics of lace knitting
10/19/20254 min read
Have you ever wanted to try knitting lace but didn’t know where to start? Lace patterns are often complex, and while the results are beautiful, lace can be quite intimidating at first. However, with practice and attention to detail, it is achievable.
What Is Lace Knitting?
Lace knitting is a technique that involves a lot of yarnovers, which create intentional holes in your knitting. The placement of the holes usually creates a lovely pattern that can be added to many different types of projects. It is usually done with a thin yarn on medium-sized needles to give a light, airy texture to the knitting.
Lace Knitting Stitches
The main stitch that defines lace is the yarnover. It is a simple increase made by wrapping the yarn over the needle, and then knitting or purling it in the next row, treating it like another stitch. Since the yarnover is not connected to the row below it, it creates a hole.
Yarnovers are often paired with decreases, so as not to change the stitch count of the row or round. The most common ones are a knit two together, which creates a right-leaning decrease, a slip slip knit, which creates a left-leaning decrease, and a centered double decrease, which decreases two stitches and doesn’t lean in one direction. For more information on how to do these stitches, check out my blog post on understanding knitting patterns here.
Lace Patterns and Charts
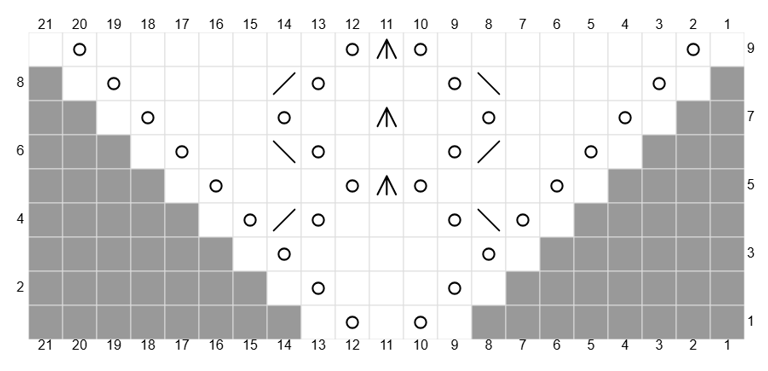
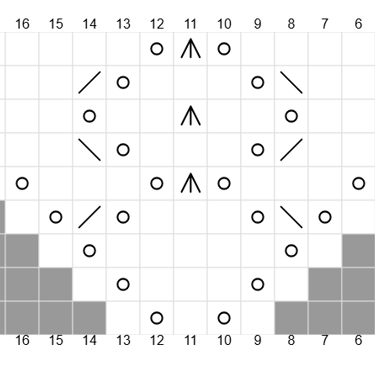
Lace patterns sometimes come with written instructions, although charts are by far the easiest way to read a lace pattern. If you struggle with reading charts, I wrote a blog post about it here. The main takeaway is to read charts from right to left on right side rows, and left to right on wrong side rows. Some lace patterns are just purled across wrong side rows, which may not be included in the chart. It is also helpful to know that some charts only show one half of what you actually knit. Traditional triangle shawls are knit from the top center down, and those charts often only include one of the two triangles you knit. Be sure to read your pattern carefully. I find it helpful to print out the charts and highlight the rows as I knit them to keep track of where I am in the pattern. Below is a simple example of a lace chart and a swatch made from that chart. Note, I purled the wrong side rows, which I did not include in the chart.
Yarn and Needle Choices
Lace knitting is usually done with lace weight yarn, although a fingering weight yarn can work as well, especially for practice. I also recommend using a wool yarn or a wool blend, as these are easier to block. Acrylic yarns are not very suitable for lace, as they don’t block as easily. Start with a light colored yarn, as it will be easier to see your stitches and read your knitting. As I mentioned, needle sizes are often a little bigger than what is recommended for the yarn weight because you want the end result to be open and airy. I also recommend using metal needles with sharp tips to knit your lace with.
Common Challenges
One of the most common challenges with knitting lace is losing count of your stitches. My trick for keeping track of my stitches when knitting lace is to put stitch markers in between each repeat and count the stitches as I go. If I end up with the wrong number of stitches in a repeat, I know I made a mistake and can tink back to fix it. This way, I find mistakes very quickly and can fix them right away, rather than having to frog, tink, or ladder down multiple rows. If you forgot a yarnover in the previous row, all you have to do is lift the bar in between the two stitches where the yarnover is supposed to go and knit or purl it like normal. Like I mentioned earlier, some lace is purled across wrong side rows, some have lace on both sides, so read your pattern carefully to understand how it works. Lifelines are incredibly helpful when knitting lace. Many interchangeable needles even have a small hole where you can thread very thin scrap yarn through it on your working needle, and as you knit across the row, it will place the lifeline in for you. This is useful for larger mistakes when you need to frog. The lifeline holds the live stitches so that when you frog, it stops at that row, and you can easily get the stitches back on your needles.
Blocking
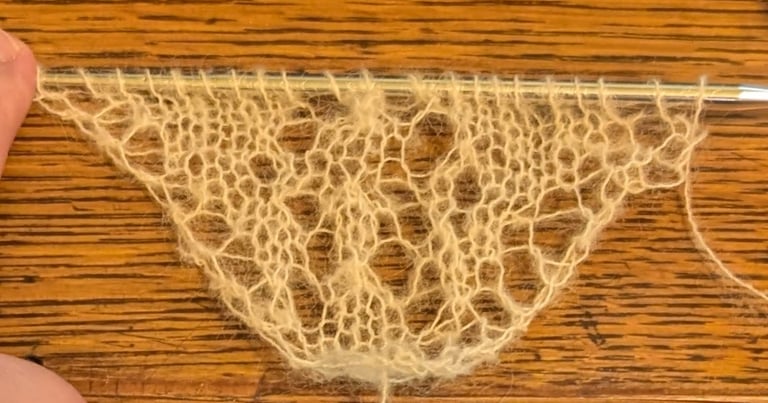
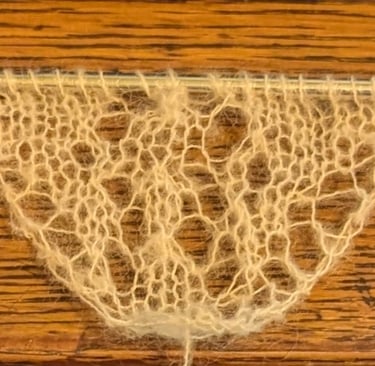
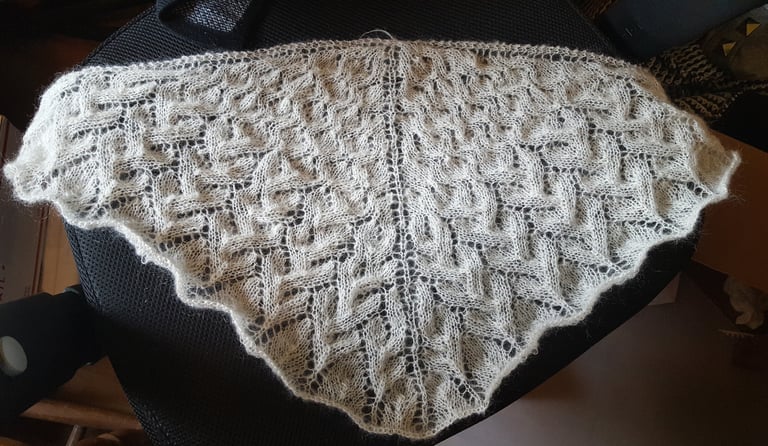
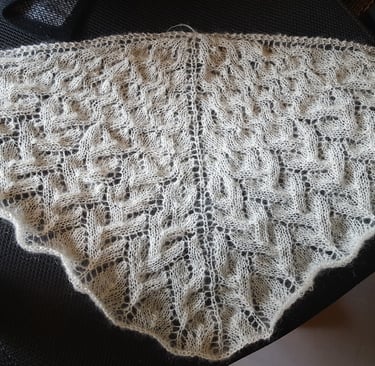
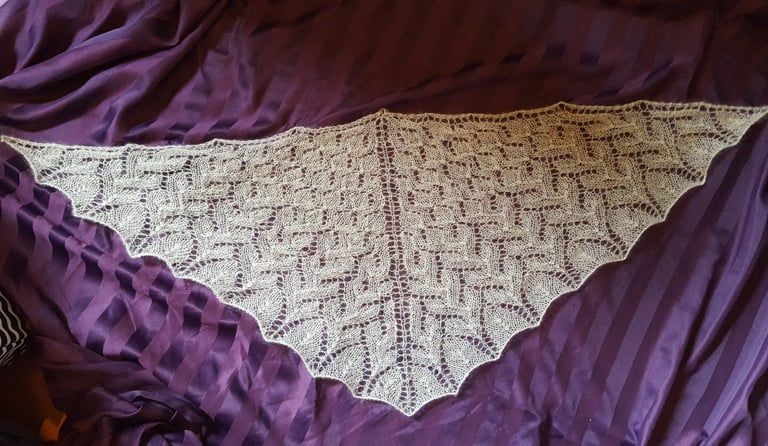
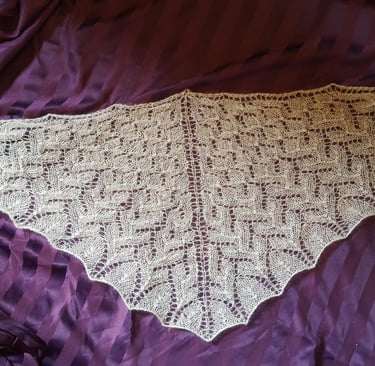
Blocking lace is like magic! As it’s knit, lace tends to look lumpy and wrinkled, but fear not! Blocking will make it look flat and pretty. The transformation is pretty incredible. Below you can see a lace shawl I made before and after blocking. I suggest wet blocking lace, where you soak your project for about 15-20 minutes in a gentle wool wash, squeeze out excess water with a towel, then pin it to the shape you want, and let it dry. The soaking not only cleans the fiber, but it also relaxes all the stitches and allows the lace to bloom.
I hope this has given you the confidence to knit lace. As always, if you have any questions or comments, use the form below to send me an email. Happy stitching!