Knitting a Gauge Swatch
How to knit a gauge swatch, how to measure your gauge, and what to do if your gauge isn't right for your pattern.
2/10/20253 min read
Knitting a gauge swatch is an important part of making most projects. There are some items like scarves and shawls where gauge doesn't matter much since they can be a little bigger or smaller than intended and still be useable. However, when you're knitting a hat, a sweater, gloves, or something else that needs to fit correctly, your gauge needs to be correct for the final measurements to be accurate.
Why is gauge important?
How to knit a gauge swatch
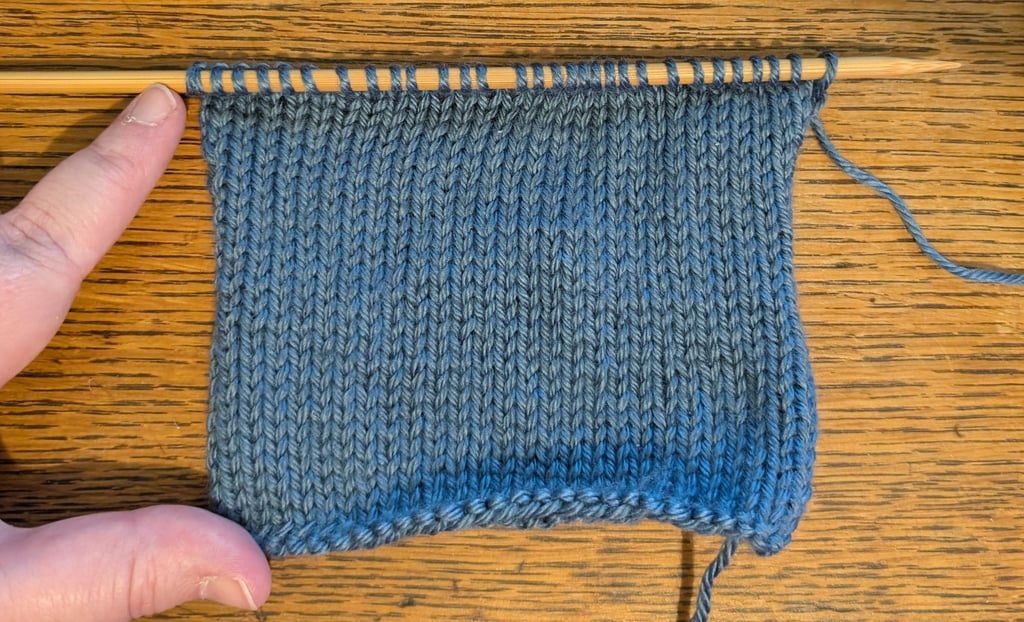
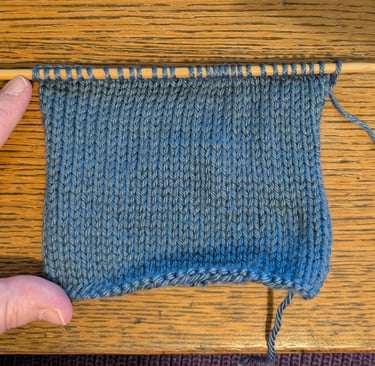
The first thing you need to figure out is whether you'll be knitting your project flat, that is, in rows, or in the round, joined in a circle. If you're knitting flat, you will want to knit your swatch flat as well. Often, you want to do this in stockinette stitch, unless your pattern instructs you otherwise. To knit stockinette stitch flat, you will alternate knit and purl rows. This means all the stitches on one side will look like V's, and you will see all the purl bumps on the other side.
If you'll be knitting in the round instead, you will still knit a flat swatch, but a little differently. Instead of knitting back and forth, you knit one row on double pointed needles (DPNs) or a circular needle. Then slide your stitches to the other end of the needle. Carry the yarn across the back (not too tightly!) and knit the next row. This mimics how you would knit stockinette stitch in the round and gives a more accurate gauge since your tension for knit and purl stitches will be slightly different.
In both cases, you want to knit a swatch that is at least 4" x 4" or 10cm x 10cm. The bigger your swatch, the more accurate your measurements will be. If you're swatching in a stitch pattern other than stockinette, you'll want to include at least one whole repeat of your stitch pattern.
Once you have a big enough swatch, bind off. Then you'll want to wash and block your swatch just like you would with your final product according to the fiber content of your yarn (watch for a future post for more on blocking). Blocking can affect the gauge of your final product, especially with certain types of fibers, so this is an important step.
How to measure your swatch
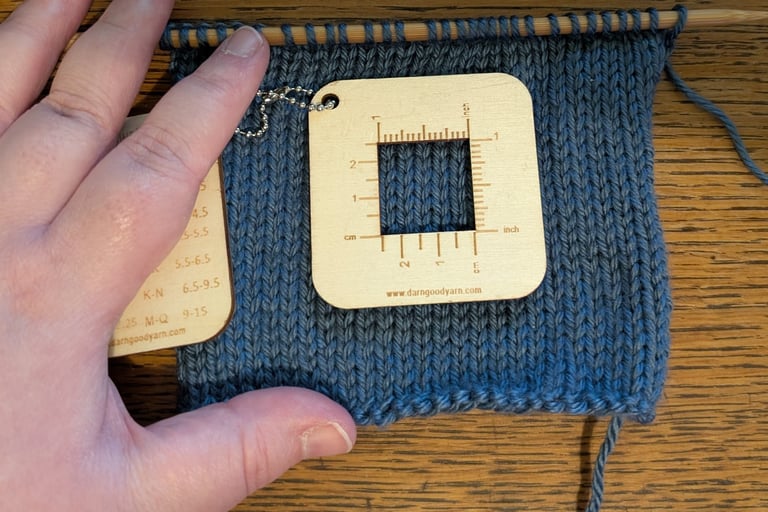
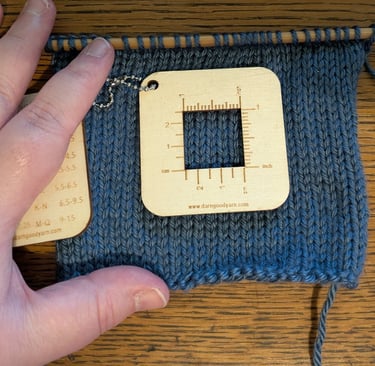
To get the most accurate measurement of your swatch, measure in four different places. You can use a ruler. a tape measure, or a tool like the one shown below that makes it easy to see exactly how many stitches there are in one inch. In my example, you can see that I have 5 stitches per inch. You want to avoid measuring too close to any of the edges, as your tension tends to be looser there. Once you have your four measurements of stitches per inch, take the average of them (add them together, divide by four).
What if my gauge doesn't match the pattern?
If your pattern calls for a particular gauge, you'll want to match it as closely as possible. If you have too many stitches per inch, try knitting the swatch again on larger needles. If you have too few stitches per inch, try smaller needles. Make sure to write down the gauge you got with the size of needles you used. Needles made with different materials may affect your gauge, so write that down too. You may want to experiment with different yarns as well, as the weight and fiber content can also affect your gauge. Or perhaps your swatch shows that you won't like the drape of the final product. That's ok too, think of knitting a swatch as auditioning yarns for your project. If you want any help or input on swatching, shoot me an email or book a consultation. Happy stitching!