How to Cast On
5 Cast-on methods for knitting
2/17/20255 min read
Casting on is the first step in starting any knitting project. There are various ways to do this, I will show you a few examples here, and explain how to choose which one to do for your project.
Knitting Cast-Ons
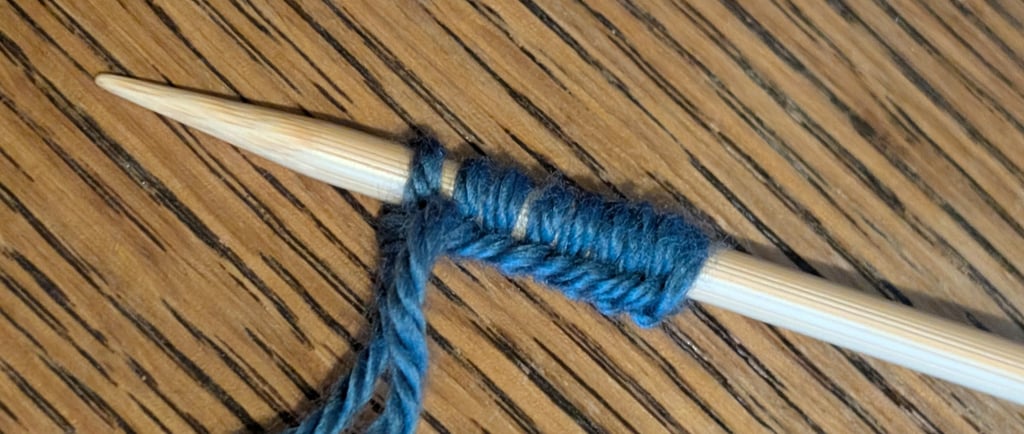
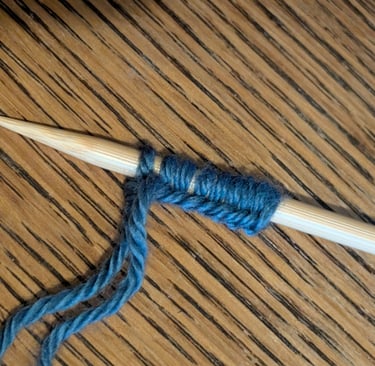
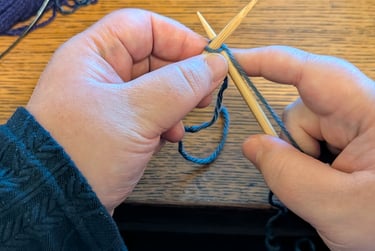
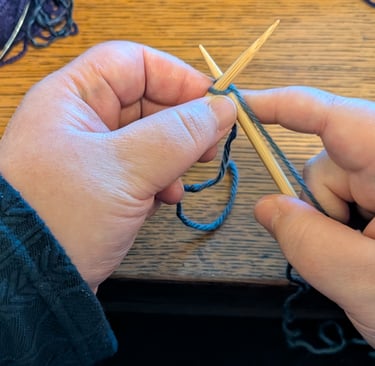
1. Knitted Cast-On
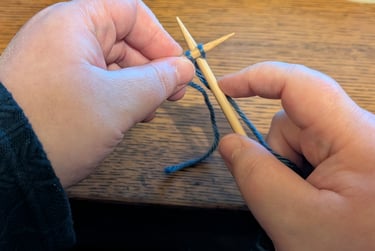
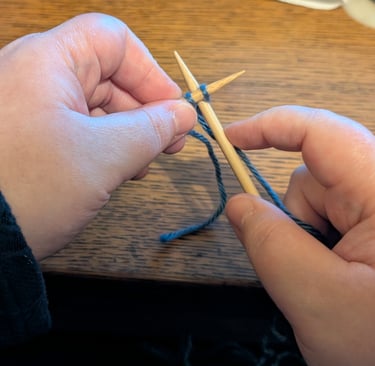
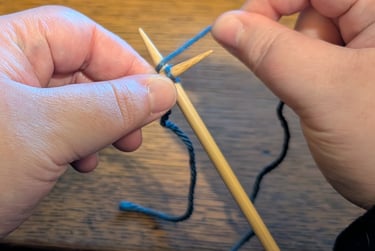
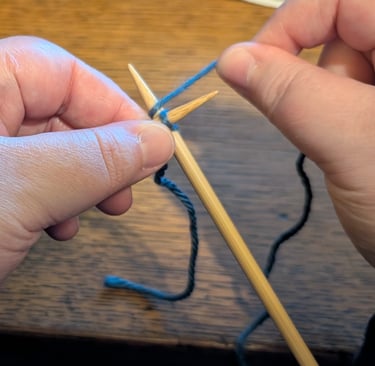
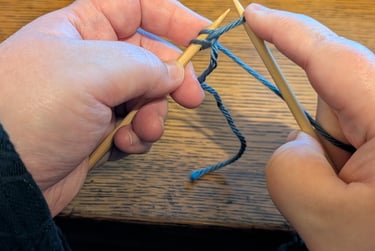
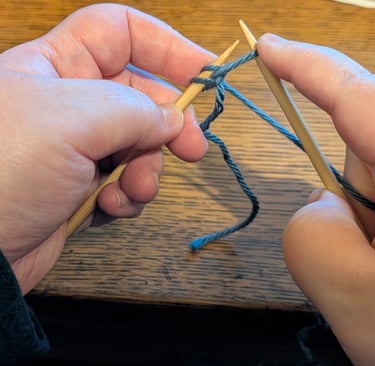
This is the cast-on I typically teach first to beginners, as it is fairly simple. Once you have this down, knit stitches are easy to do next! It only uses one strand of yarn, and only requires knowing a knit stitch. It creates a somewhat loose, stretchy edge, however, it's not as sturdy as some others, it takes a bit longer, and uses more yarn.
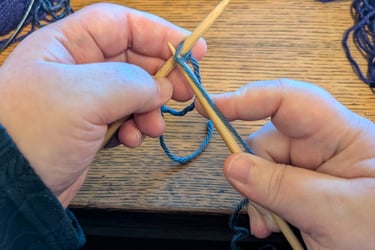
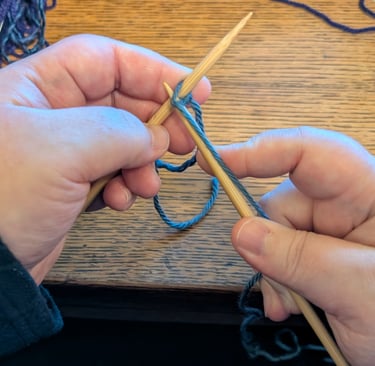
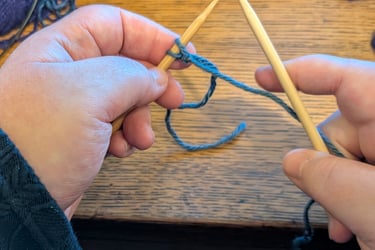
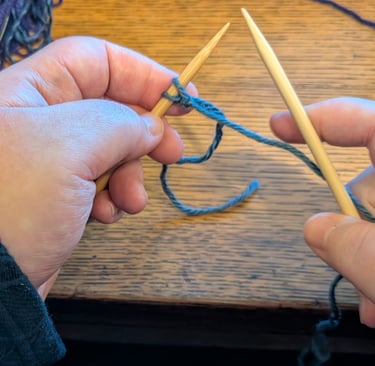
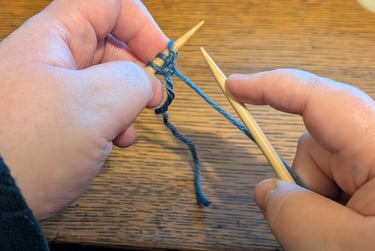
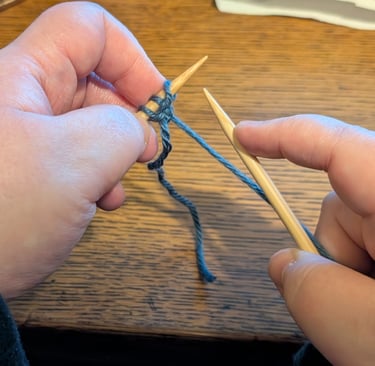
First, start with a slipknot. Then, holding the needle with the loop in your left hand, insert your second needle through the loop, as shown below. Wrap the working yarn under the right needle from right to left, then over left to right, or clockwise when facing the same way the needle is pointing. Use the tip of the right needle to scoop the yarn you just wrapped through the slipknot. Place this new loop onto the left needle. Repeat until you have the number of stitches required for your swatch or project.
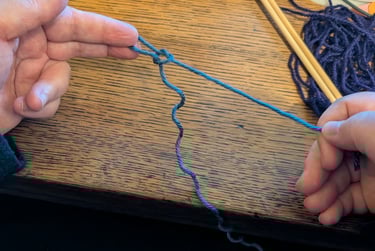
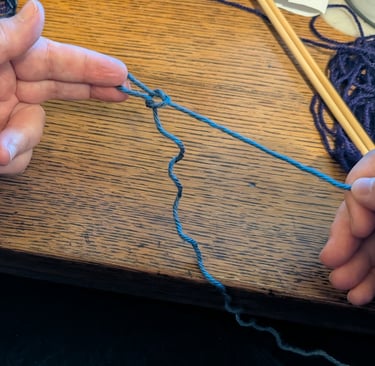
How to Make a Slipknot
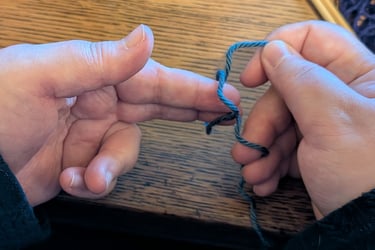
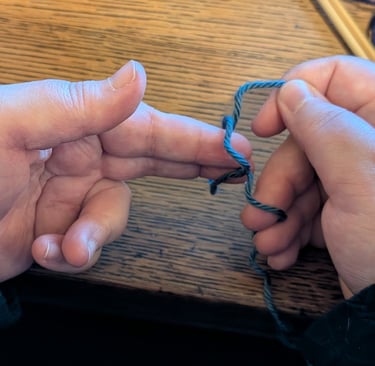
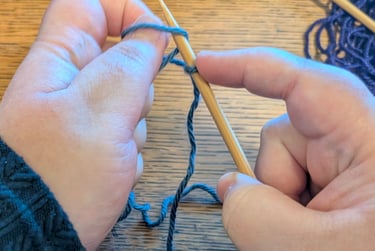
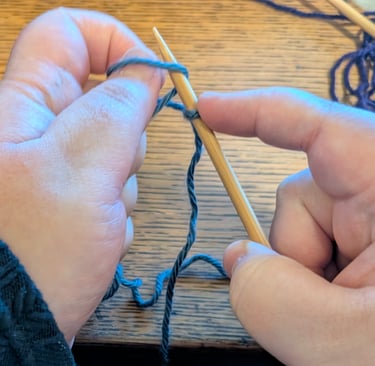
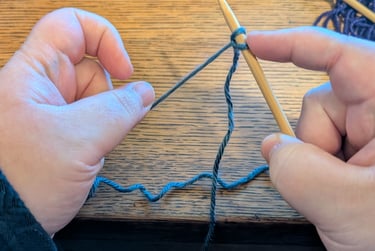
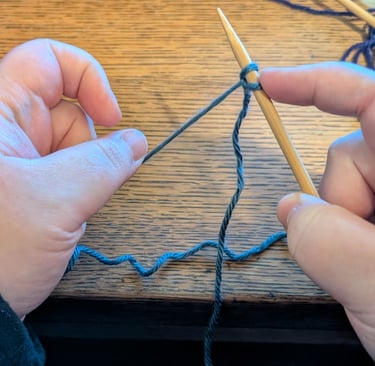
Many cast-ons for knitting start with making a slipknot. If you want to learn crochet, flat crochet projects start with a slipknot too, so knowing how to do one comes in handy. First make a loop loosely around two fingers, with the tail end on top of the working yarn (the yarn connected to the skein). While holding the tail, grab the working yarn and pull it through the loop around your fingers. Pull the loop and the tail simultaneously until the knot tightens. Put the loop on your knitting needle (or crochet hook), and pull the tail until the loop is close to the needle. Now you're ready to cast on!
2. Backwards Loop Cast-On
This cast-on is often taught first to beginners, but I'm going to be honest, I hate it so much! It is the simplest and fastest cast-on though, so I will teach it to you anyway. While it is simple and quick, the reason I hate it is that it is very easy to make it too tight and create an uneven edge. I almost quit knitting until I learned there were other cast-on methods.
First, you start with a slipknot. Then twist the working yarn around your thumb, as shown below. Place the twist on the needle. Repeat until you have enough stitches for your swatch or project. That's it! It's deceptively simple...
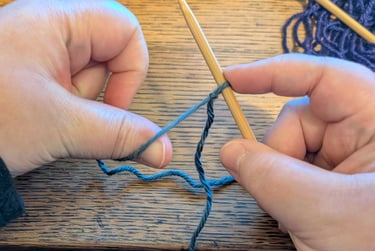
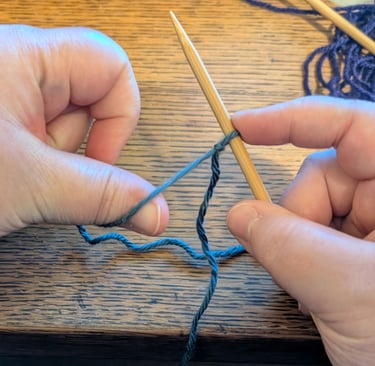
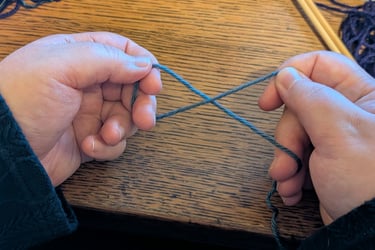
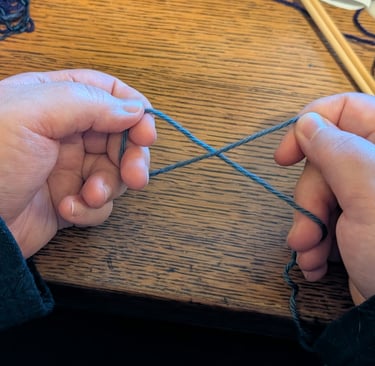
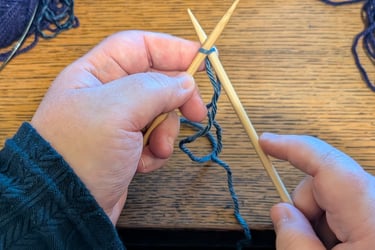
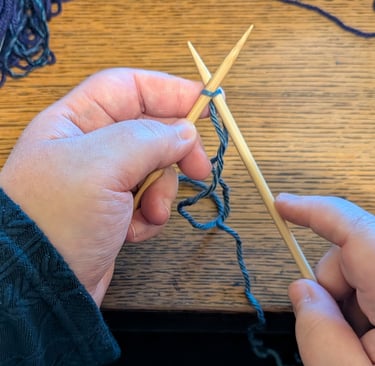
3. Long-Tail Cast-On
This is my favorite cast-on, and I use it almost exclusively, unless a pattern I'm using calls for something else. The downside is figuring out how long of a tail you need, and it can be a bit tricky at first, as it requires managing two strands of yarn, but it is definitely worth learning in my opinion! It is durable, yet stretchy, and is quite versatile.
This cast-on does not start with a slipknot. To begin, create a long tail, the more stitches you need, the longer your tail should be. Drape the tail end over your left thumb and the working yarn over your index finger, as shown below, holding both ends in place with your other left fingers. Place your needle under the yarn between your thumb and index finger, use your right index finger to hold it in place. Bring the needle around and under the strand around your thumb, then around and under the strand over your index finger, making a figure 8 motion. Drop both strands and tighten the stitch on the needle. Drape both strands over your left thumb and index finger again and repeat as necessary.
4. Cable Cast-On
A cable cast-on creates a beautiful braid-like sturdy edge but can be a bit time-consuming. Its rigidity makes it great for pockets, bag handles or straps, and button bands. It works very similarly to the knitted cast-on, making it easy to learn.
Start with a slipknot, then make your second stitch just like the knitted cast-on. For the rest of the stitches, you'll insert your right needle in between the previous two stitches, wrap the working yarn around the right needle, pull the loop through, and place it on the left needle.
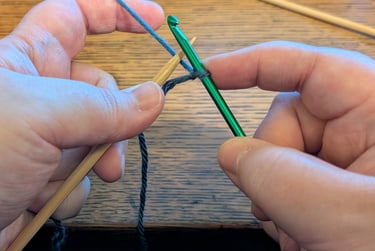
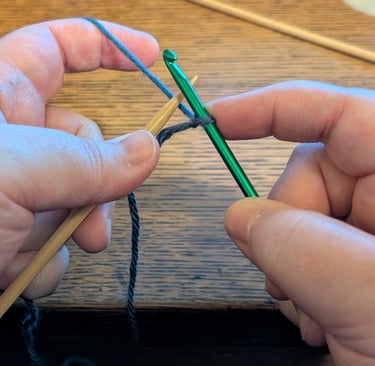
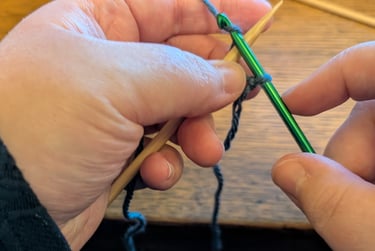
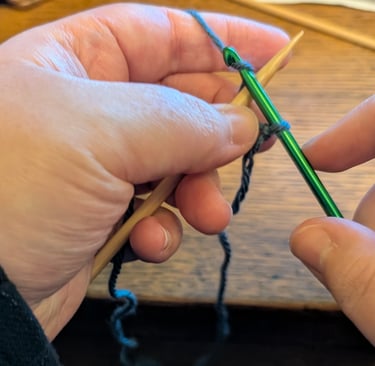
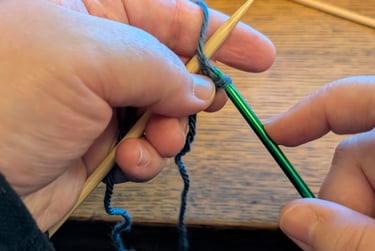
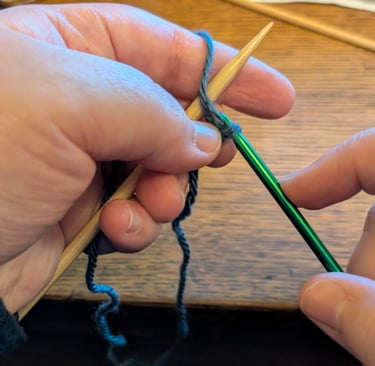
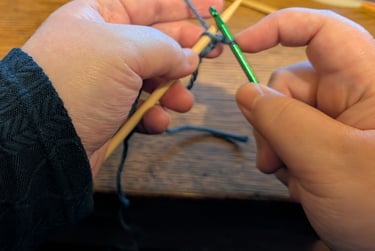
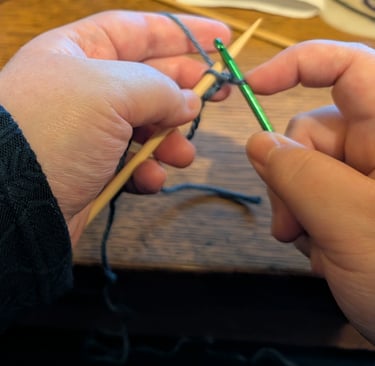
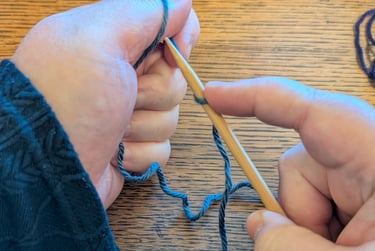
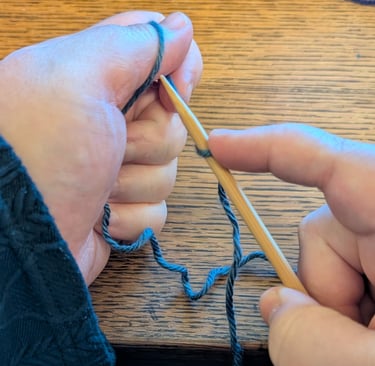
5. Crochet Cast-On
A crochet cast-on requires a crochet hook, but it works well for those who know how to crochet already, and it makes a great provisional cast-on. A provisional cast-on is great for when you will connect a different edge to the cast-on, like with an infinity scarf, or if you'll add a border later.
Start by making a slipknot, and put it on your crochet hook. Hold your knitting needle between the hook and the working yarn. Use the hook to pull the working yarn around the needle through the loop. Move the working yarn behind the needle again, and repeat.

These are just a few possible cast-on methods. There are many more that work well for different projects, but these are the most important ones to learn for most projects. Stay tuned for a future blog post on cast-ons worked in the round! As always, if you have any questions, feel free to email me using the form below. Happy stitching!